 在 TensorFlow.org 上查看 在 TensorFlow.org 上查看
|
 在 Google Colab 中运行 在 Google Colab 中运行
|
 在 GitHub 上查看源代码 在 GitHub 上查看源代码
|
 下载笔记本 下载笔记本
|
概述
自动语音识别中最大的挑战之一是音频数据的准备和增强。音频数据分析可以在时域或频域进行,与图像等其他数据源相比,这增加了额外的复杂性。
作为 TensorFlow 生态系统的一部分,tensorflow-io 包提供了许多有用的音频相关 API,有助于简化音频数据的准备和增强。
设置
安装所需的包,并重启运行时
pip install tensorflow-io
用法
读取音频文件
在 TensorFlow IO 中,类 tfio.audio.AudioIOTensor 允许您将音频文件读取到一个延迟加载的 IOTensor 中
import tensorflow as tf
import tensorflow_io as tfio

audio = tfio.audio.AudioIOTensor('gs://cloud-samples-tests/speech/brooklyn.flac')

print(audio)
<AudioIOTensor: shape=[28979 1], dtype=<dtype: 'int16'>, rate=16000>
在上面的示例中,Flac 文件 brooklyn.flac 来自 google cloud 中的公开可访问的音频剪辑。
GCS 地址 gs://cloud-samples-tests/speech/brooklyn.flac 被直接使用,因为 GCS 是 TensorFlow 中支持的文件系统。除了 Flac 格式,WAV、Ogg、MP3 和 MP4A 也由 AudioIOTensor 支持,并具有自动文件格式检测功能。
AudioIOTensor 是延迟加载的,因此最初只显示形状、数据类型和采样率。 AudioIOTensor 的形状表示为 [样本,通道],这意味着您加载的音频剪辑是单声道通道,在 int16 中有 28979 个样本。
音频剪辑的内容将仅在需要时读取,可以通过 to_tensor() 将 AudioIOTensor 转换为 Tensor,或者通过切片进行读取。切片在只需要大型音频剪辑的一小部分时特别有用。
audio_slice = audio[100:]

# remove last dimension
audio_tensor = tf.squeeze(audio_slice, axis=[-1])

print(audio_tensor)
tf.Tensor([16 39 66 ... 56 81 83], shape=(28879,), dtype=int16)
音频可以通过以下方式播放
from IPython.display import Audio

Audio(audio_tensor.numpy(), rate=audio.rate.numpy())
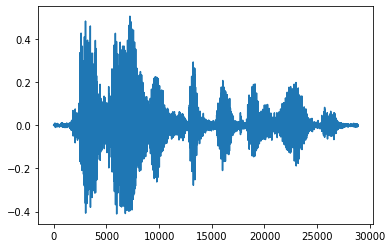
将张量转换为浮点数并以图形形式显示音频剪辑更方便
import matplotlib.pyplot as plt


tensor = tf.cast(audio_tensor, tf.float32) / 32768.0

plt.figure()
plt.plot(tensor.numpy())
[<matplotlib.lines.Line2D at 0x7fbdd3eb72d0>]
修剪噪声
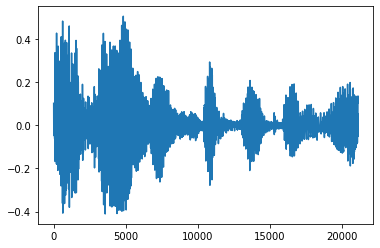
有时从音频中修剪噪声是有意义的,这可以通过 API tfio.audio.trim 完成。API 返回的是片段的 [开始,结束] 位置对。
position = tfio.audio.trim(tensor, axis=0, epsilon=0.1)
print(position)

start = position[0]
stop = position[1]
print(start, stop)

processed = tensor[start:stop]

plt.figure()
plt.plot(processed.numpy())
tf.Tensor([ 2398 23546], shape=(2,), dtype=int64)
tf.Tensor(2398, shape=(), dtype=int64) tf.Tensor(23546, shape=(), dtype=int64)
[<matplotlib.lines.Line2D at 0x7fbdd3dce9d0>]
淡入和淡出
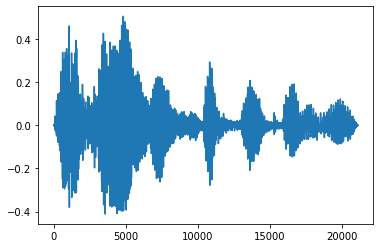
一种有用的音频工程技术是淡入淡出,它会逐渐增加或减少音频信号。这可以通过 tfio.audio.fade 完成。 tfio.audio.fade 支持不同的淡入淡出形状,例如 linear、logarithmic 或 exponential。
fade = tfio.audio.fade(
    processed, fade_in=1000, fade_out=2000, mode="logarithmic")

plt.figure()
plt.plot(fade.numpy())
[<matplotlib.lines.Line2D at 0x7fbdd00d9b10>]
频谱图
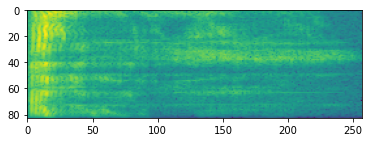
高级音频处理通常针对随时间变化的频率变化进行。在 tensorflow-io 中,可以使用 tfio.audio.spectrogram 将波形转换为频谱图。
# Convert to spectrogram
spectrogram = tfio.audio.spectrogram(
    fade, nfft=512, window=512, stride=256)

plt.figure()
plt.imshow(tf.math.log(spectrogram).numpy())
<matplotlib.image.AxesImage at 0x7fbdd005add0>
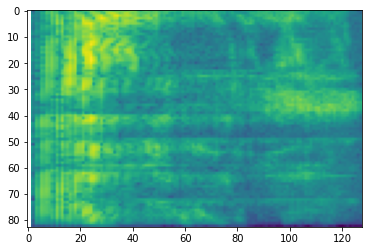
还可以进行其他转换为不同的比例。
# Convert to mel-spectrogram
mel_spectrogram = tfio.audio.melscale(
    spectrogram, rate=16000, mels=128, fmin=0, fmax=8000)


plt.figure()
plt.imshow(tf.math.log(mel_spectrogram).numpy())

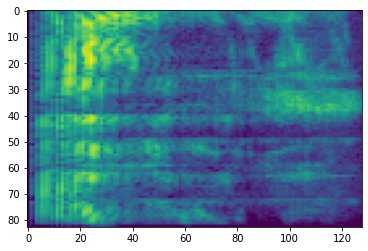
# Convert to db scale mel-spectrogram
dbscale_mel_spectrogram = tfio.audio.dbscale(
    mel_spectrogram, top_db=80)

plt.figure()
plt.imshow(dbscale_mel_spectrogram.numpy())
<matplotlib.image.AxesImage at 0x7fbcfb20bd10>
SpecAugment
除了上面提到的数据准备和增强 API 之外,tensorflow-io 包还提供高级频谱图增强,最值得注意的是 SpecAugment: A Simple Data Augmentation Method for Automatic Speech Recognition (Park et al., 2019) 中讨论的频率和时间掩蔽。
频率掩蔽
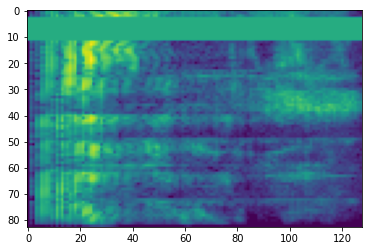
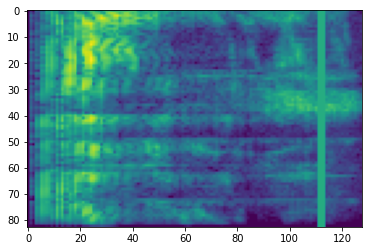
在频率掩蔽中,频率通道 [f0, f0 + f) 被掩蔽,其中 f 从 0 到频率掩蔽参数 F 的均匀分布中选择,f0 从 (0, ν − f) 中选择,其中 ν 是频率通道的数量。
# Freq masking
freq_mask = tfio.audio.freq_mask(dbscale_mel_spectrogram, param=10)

plt.figure()
plt.imshow(freq_mask.numpy())
<matplotlib.image.AxesImage at 0x7fbcfb155cd0>
时间掩蔽
在时间掩蔽中,t 个连续的时间步 [t0, t0 + t) 被掩蔽,其中 t 从 0 到时间掩蔽参数 T 的均匀分布中选择,t0 从 [0, τ − t) 中选择,其中 τ 是时间步。
# Time masking
time_mask = tfio.audio.time_mask(dbscale_mel_spectrogram, param=10)

plt.figure()
plt.imshow(time_mask.numpy())
<matplotlib.image.AxesImage at 0x7fbcfb0d9bd0>
